How I built Android for zWatch (and how you can too now)
The story...
SmartQ zWatch was a cheap-ish smartwatch that has been available online for the last few years. It came with its own android-based OS and no sources. The updates from the manufacturer were quick initially, but soon stopped. Luckily there was an "unbrick tool" also published that allows to recover the device no matter its current state. The updates were published as unsigned zip files that the the existing bootloader would apply on boot if found in the /media partition. Some people created some "ROM"s for this watch, but all of them were just small modifications of the stock firmware. My goal was to produce a fully open-source version of Android for this device. Well, Android is already open source, but the device-specific parts for this device clearly are not.
First, I spent a lot of time inspecting the existing OS and libraries using a disassembler. Then I made a fake build from AOSP for the MIPS architecture, and started comparing what files were in one but not the other. There were a lot. One by one I categorized all of them into two piles: important and not. Most of the HALs were obviously important. Most other files were likely not as important. The next step was producing a build that used the existing binaries of the HALs as pre-built but otherwise worked. This actually took quite a lot of time and work, but eventually Android 4.4.4 ran. It did not run well. The screen flickered insanely, audio did not work, WiFi did not work. But it was an encouraging start - it booted. I estimate that to get to this step I used the "unbrick" tool about 200 times on this watch.
There actually was a lot of work that was unrelated to the HALs. I got that out of the way first. Various config files, fstab changes, etc were parts of this change. Also there ewre some changes for make & init files. Overall this took probably another 50 reflashes and tests. Among all this came WiFi and BT firmware files, making WiFi and BT work.
There are 4 HALs that are necessary for this watch and 2 libraries. The HALs are: audio, gralloc, hwcomposer, and sensors. The libraries are: DMMU and GLES. The watch lacks a GPU of any sort and thus uses software rendering. This is not terribly fast on a 1GHz MIPS CPU, but luckily there are few enough pixels on the screen that this is not debilitating for watch purposes. DMMU is a driver for the IOMMU that is built in to most large peripherals in the JZ4775 CPU. I'll tell here a short story about each HAL & library that I had to produce.
But before all of the userspace work, I decided to take a look at the kernel sources. As per the GPL (under which the Linux kernel is licensed), the manufacturer had to have provided a written offer of sources. Needless to say that a random chinese company (SmartQ, currently owned by Huami) does not care even a little about this sort of thing. I checked their site every which way I could, and found no sources. Emaling them produced no reply, of course. Of course, why would it? I tried to find some people on LinkedIn who might help, but I was told in no uncertain terms to go away. Ok then... time to fire up the disassembler. I unpacked their stock boot image, then unpacked the compressed kernel image, and then sicced IDA on it. With a whole lot of work, and a script that took the contents of /proc/kallsyms and named functions at those addresses, I had a somewhat useful disassembly of their kernel. It was not nearly enough to reproduce it, but enouhg to provide some light reference material.
The sensors HAL was the first one I tackled. Having the disassembled kernel and a copy of the existing sensor hal made this a relatively easy task. Having never written a full android sensor HAL, it took a little work to sort it all out. But then again, this is an easy HAL. The device only has an accelerometer, and the kernel driver manages pretty much everything about it. Good news: the HAL is simple. Bad news: not much we can do besides gettig samples from it. No fancy effects, no programming it to do tilt detect, nothing. Sad day. Well, at least it works for sensor test apps amd screen rotation. Perhaps we can later modify the kernel driver to allow the HAL to do more. Well, ha!, that is if we ever get the kernel sources.
Graphics system in android (at least as far as I understand it) uses three HALs: GL, Gralloc, and hwcomposer. Gralloc allocates opaque buffers that can be used by GL and hwc. It also frees those buffers, and maps them into the current process's address space if this buffer was sent in from another process. Also the gralloc HAL provides ability to map the framebuffer in to the current address space. One might rightly ask why one needs a special way of allocationg memory in a device with no GPU. True, if we were to use an entirely software graphics pipeline, we could use the generic android hwc and gralloc. But that is not our intention. More about that later. But for now we have to implement gralloc. What will it do? When asked to, allocate a buffer from ashmem, map it, unmap it, release it, etc. The framebuffer part of it will open and close the framebuffer device. All nice and easy. The only unusual thing here is the ioctl used to flip framebuffer buffers is not the normal one. Oh well, a little disassembling of te existing gralloc module solved that mystery.
My goals in writing my hwc is using X2D. It is a 2-D accelerator that is built-in to the JZ4775 SoC. It can rotate, flip, scale, and blend up to 4 layers onto a base layer. Multiple formats are supported. This is not an overlay - it does not overlay anything on top of the screen, it only does compositing to RAM. So I simply allocated a buffer to composite into. This is actually good. That means that if we have to composite more than 4 layers, we can just run X2D's blending engine twice. The docuemtntation on X2D is reasonably good in the JZ4775 manual, if you like "Engrish." I supplemented my reading of the SoC manual with the kernel disassembly and the disassembly of the existing hwc. This was going well, till I realized that the existing hwc did not use many fatures, and used a few badly. In fact the fact that the watch worked at all the way it was shipped was a miracle (more on that later). In any case, I got it to work with proper format conversions and all the scaling/flipping/etc that Android needs. It does work, and rather fast. I then went further and implemented the HWC 1.3 version, including offloading the compositing unto a separate thread (the kernel driver blocks the caling thread till the hardware is done compositing) and support for virtual displays. Since X2D is a hardware block, and has no idea bout the current Linux MMU config, how will it ever find our buffers? DMMU is the answer. More on this later.
GL libraries are necessary for android to talk to the GPU in any device. This becomes much easier if there is no GPU. Android sources do include a software GPU renderer, but it is not built for any targets other than the emulator. Forcing it to build for some reason (which I no longer remember) did not work, so I made a copy and with a few changes it works. Since this is all in software, no special memory handling is needed, and the normal calls into gralloc to lock/unlock buffers work correctly. Some changes did have to be made due to the native pixel order not being RGBA.
I have mentioned that the fact that anything worked at all for the watch as it shipped was a miracle. Why? There were two separate processes independently posting framebuffer udpates. FB hal did it at android's behest sometimes, and hwc did sometimes too. Each flipped the page on the framebuffer, and no locking was used. To combat this sort of thing from happening again I created a new gralloc flag "POSTABLE," If it is not set, a buffer will not post to screen. We set this only on buffers that hwc allocates for compositing into. Problem solved - now anyone can try to post anything they want directly to FB, but only hwc actually can. Cool.
So, about that DMMU thing I mentioned... The CPU in this watch has a few large non-cpu blocks: a video decoder and the X2D graphics accelerator. Both of them have an IOMMU in front of them. It is a weird MMU, unlike the normal MIPS TLB. It is a single-level pagetable assuming 4K pages. This means that each such table takes 4 bytes per each mapped 4K page, and allows no holes. This is actually rather simple. The kernel already has a driver for DMMU, and the userspace library that managed access to this driver was taken from older published ingenic sources, with changes to make it cleaner and simpler.
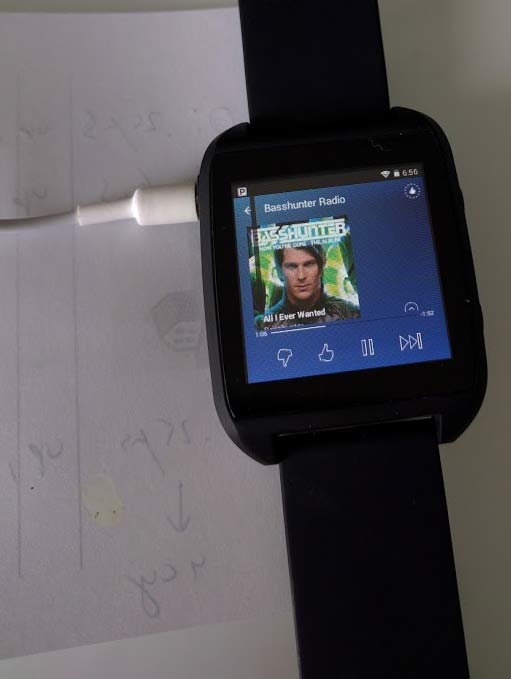
The audio HAL was rather straighforward. It did require some disassembly to learn the ioctl numbers needed to get the kernel audio drivers to do what I wanted it to. Eventually it did all work, and i verified that audio recording from microphone and audio playback over speakers worked. It is at this point that I managed for the first time to play music from Pandora on the watch. This was very very exciting!
I also had to make some bootloader changes. "Hm," you might say - "how did you change the bootloader if it is not open-source?" Well, with a hex editor mostly. I used this to modify the way the bootloader partitioned flash to made /userdata large and make /media as tiny as possible. I also modified the commandline passed to the kernel to make Android M boot on this hardware. The changes were not that large, but they did require quite a bit of diassembly to figure out.
Did I just mention Marshmallow? Yes, I did. So when why am I releasing here images for Android 4.4.4 and not for 6.0? Well, Android 6.0 requires some kernel changes to get WiFi to work well. I did mention that I have no kernel sources, right? Well, that means that Marshmallow will not be able to use WiFi. Not that useful, eh? To be fully accurate, though, these device files I produced WILL in fact allow Marshmallow to boot on this device. But still WiFi will not work till you add the necessary bits to the kernel.
The story does take a rather weird turn at this point. The board name for the watch internally is "s2122b," the watch (and concievably the kernel) was produced by SmartQ, the CPU is made by Ingenic. Ok, so what does this all mean? Ingenic has a few new CPUs out now, including m150. They also have board with these CPUs out there for purchase. So where am I going with all this? Well, idlly looking at the kernel for the "halley" board, i noticed it had a defconfig for a "s2122b" kernel. Whoa! What are the chances that two companies would pick the same board name for independent boards? Well, I figured i'd try. I built it and flashed it. It booted! USB worked, but not much else. Graphics sort of worked, but it kept sliding sideways (like an old TV). I put some work into this kernel, and at this point touch works, graphics work ok, DMMU works, Accelerometer works, and BT works. I am not yet ready to release it since it is not even close to complete, but there is hope. My theory is that s2122b was a proof-of-concept board that Ingenic made. SmartQ then took it, made a watch from it, did not even bother changing the board name. They likely changed a few things in there before shipping. This explains why the kernel I built almost works - it targets an older version of a similar board. Well, it is a start. If you want to try to work on this, I am happy to give you a copy, but with no promises!
Ok, so how do I build it?
#get Android K AOSP into folder called K
mkdir K
cd K
repo init -u https://android.googlesource.com/platform/manifest -b android-4.4.4_r2
repo sync -j4 -c

#unpack my provided package
mkdir device/dmitrygr
tar xvfj ../zwatch_sources.tar.bz2 -C device/dmitrygr

#build android
source build/envsetup.sh
lunch s2122b-userdebug
make -j4
Ok, ok, give me the files already!
These images all use the shipped kernel from their 3.7 update (latest i can find anywhere)I wish I could give you source to this kernel, but I simply do not have it
Download source if you want to make the build yourself: => [PACKAGE YOU'LL NEED (mirror)] <=
If you're not a person who wants to build android yourself from source, here is fully usable image. I suggest using SmartQ's debricking tool(mirror) to flash it. Images here => [IMAGES (mirror)] <=
If you want tool + images (literally run it and go), here you go: archive(mirror)
Plase do not re-host this elsewhere and claim this as your work.
