Table of Contents
- The request
- The theory
- Hardware
- Firmware
- PalmOS-side software
- Comms protocol
- Using SASD
- Software (pt3)
- How to make your own
- Downloads
- Comments...
The request
"How hard would it be to attach an SD card to a 1996 Palm Pilot 5000 and have software support it?"
...thus SASD (serially-attached SD) was born.
The theory
Well, PalmOS devices, from the initial PalmPilot to the Palm III series all used the same docking connector which features RS232-compatible serial port, with full flow control. So, in theory, we could communicate with it this way. An external microcontroller could be provided for handling the SD protocol and for serving data to PalmOS over the serial port. In theory this should not be that hard...
The PalmOS side could be a standard slot driver (PalmOS parlance for block device driver), talking to the microcontroller over the standard Serial Manager API. Also, in theory, easy...
Hardware
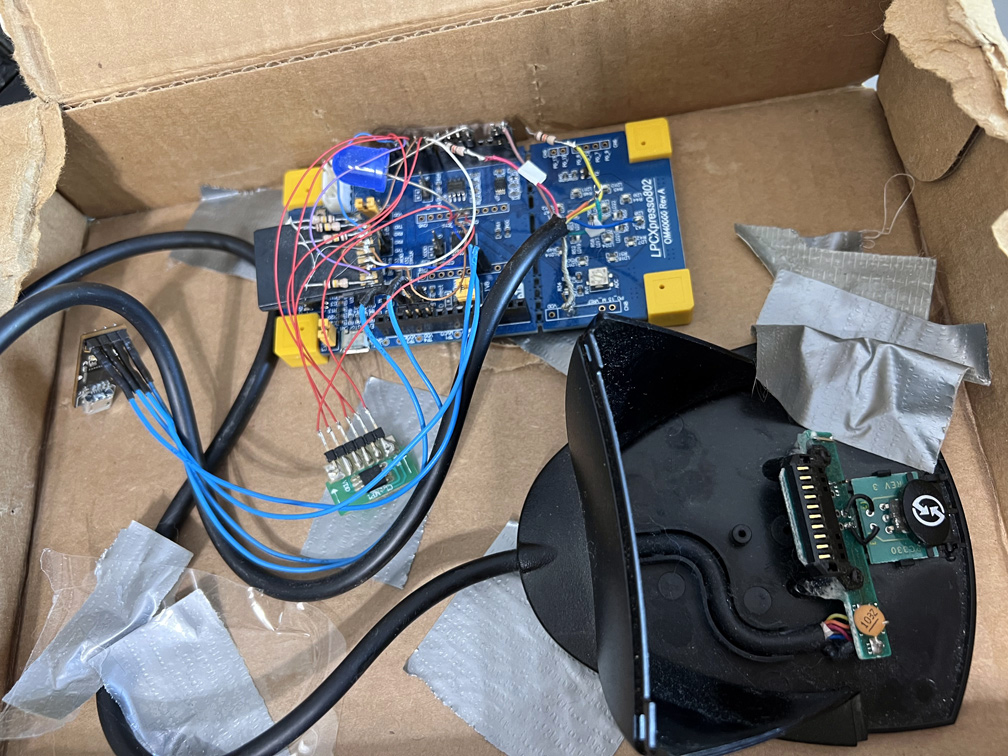
The main goal was to make this device easy to build by someone with minimal experience. This means: easy-to-get parts, no complicated soldering, and a minimal number of components on a simple two-layer board. This did not all go according to plan, but the final results are still pretty close after all. As Palm does not provide enough power via the connector to power an SD card, instead a single AAA battery was chosen as a small-enough solution. Here you can see what the first prototype looked like! It is in a box since I took it with me when traveling once, and this box became its home.
Serial Port
Palm devices have a real RS232 serial port. They use one of a few interface chips to do +/-6 volt signalling. The chip options are: SP385, MAX3232, or LTC1385. They are so similar, they even have the same footprint. To properly interface those we'd need another one of those chips to convert those signal levels to 3.3V signalling. I decided to not do that, for cost (those chips are not cheap) and simplicity reasons.
For serial ports, RS232 signalling uses a negative voltage (around -6.6V) to signal a 1 and a positive voltage (around +6.6V) to signal a zero. TTL-level signalling uses 0V to indicate a zero and 3.3V to signal 1. So, how do we make these two work together without needing a special chip? Reading the manuals for SP385, LTC1385, and MAX3232 indicates that they'll accept any voltage lower than +1.3V as a 1 and any voltage over +1.7V as a 0. OK, so those are voltages we can produce right out of a TTL UART. Those signal values are just inverses of what the UART would normally use. Not a problem, some chips have UARTs that can invert output. OK, that handles the microcontroller -> Palm communication. How do we handle the other way?
Most modern chips have diodes built in to every pin to protect from ESD. Usually there is one diode to Vcc that will allow any ESD over Vcc to flow to Vcc and another diode to GND to allow any ESD below 0V to flow to GND. This means that if we connect the RS232 signal (through a resistor to limit current) to the pin, we'll never really see negative voltages on it, or voltages over Vcc, since the ESD diodes will clip the voltages for us. This will introduce some noise, but at the slow speed we'll be using, it will not be noticeable! It should be noted that this will still be inverted from the normal TTL signalling, so we'll need a chip that can also accept inverted UART input.
It should be foreshadowed now that this design would go on to cause trouble later...
Handling Initial Flashing
Since I wanted this device to be easy to assemble, it would be nice to pick a chip whose firmware can be programmed via a serial port, without needing a custom programming tool. This would make it much easier to just assemble the board and go! Luckily, some chips do have ROM bootloaders that support such things.
Chip Selection
LPC802M001 was chosen for several reasons: its simple ROM bootloader, its UART's ability to handle inverted input and output, its low price, its easy-to-solder package, its very flexible UART baudrate divider, and its availability on mouser.com and digikey.com. Besides it, MCP1640 was chosen to boost the AAA battery's voltage to 3.3V. The rest was seemingly obvious - a wire from the battery to an ADC pin to measure the battery voltage, SPI wired to a microSD slot, wires, as described, to the serial port to the Palm, and one more wire for flow control in the to-Palm direction. Flow control in the from-Palm direction is not needed. The LPC chip is so fast that it can always be ready to receive from Palm - no flow control needed. There is also an activity LED, because blinkenlights!
The issue that I had foreshadowed above reared its head once the first real boards showed up. The MCP1640 needs to be enabled and disabled so it is only on when needed. Luckily for us, when a PalmOS application opens the serial port, a line called DTR goes up to 6.6V. Otherwise it idles around 3.3V. And, of course, if the SASD device is not connected to a Palm device at all, the pin will float. Well, MCP1640 has an enable pin which needs to be > 0.9 * Vin to be enabled and < 0.2 * Vin to be disabled. Mapping DTR values to this turned out to be rather hard, since Vin - the battery voltage will vary from 1.6V for a new AAA battery to about 0.9V for an empty battery. The final solution turned out to be a very precise zener diode. Other options considered involved FETs. The initial solution was a resistor divider and it did not work.
The connector
The last order of business was the connector itself. Obviously, I could not simply pick up my time-phone and call up Palm HQ, year 1997 to ask them for some connectors. They, indeed, used to sell them, but of course - not anymore. Initial ideas involved carefully bending copper pieces (does not scale), using battery connectors designed for phones (too tall), or using pogo pins (too expensive, $$ouch$$). Luckily, MP came up with a solution - a particular pin type that fit the bill in terms of flexibility, availability, and height. Behold the TE 2306654-3! Six of these make up the contacts used to interface the Palm connector.
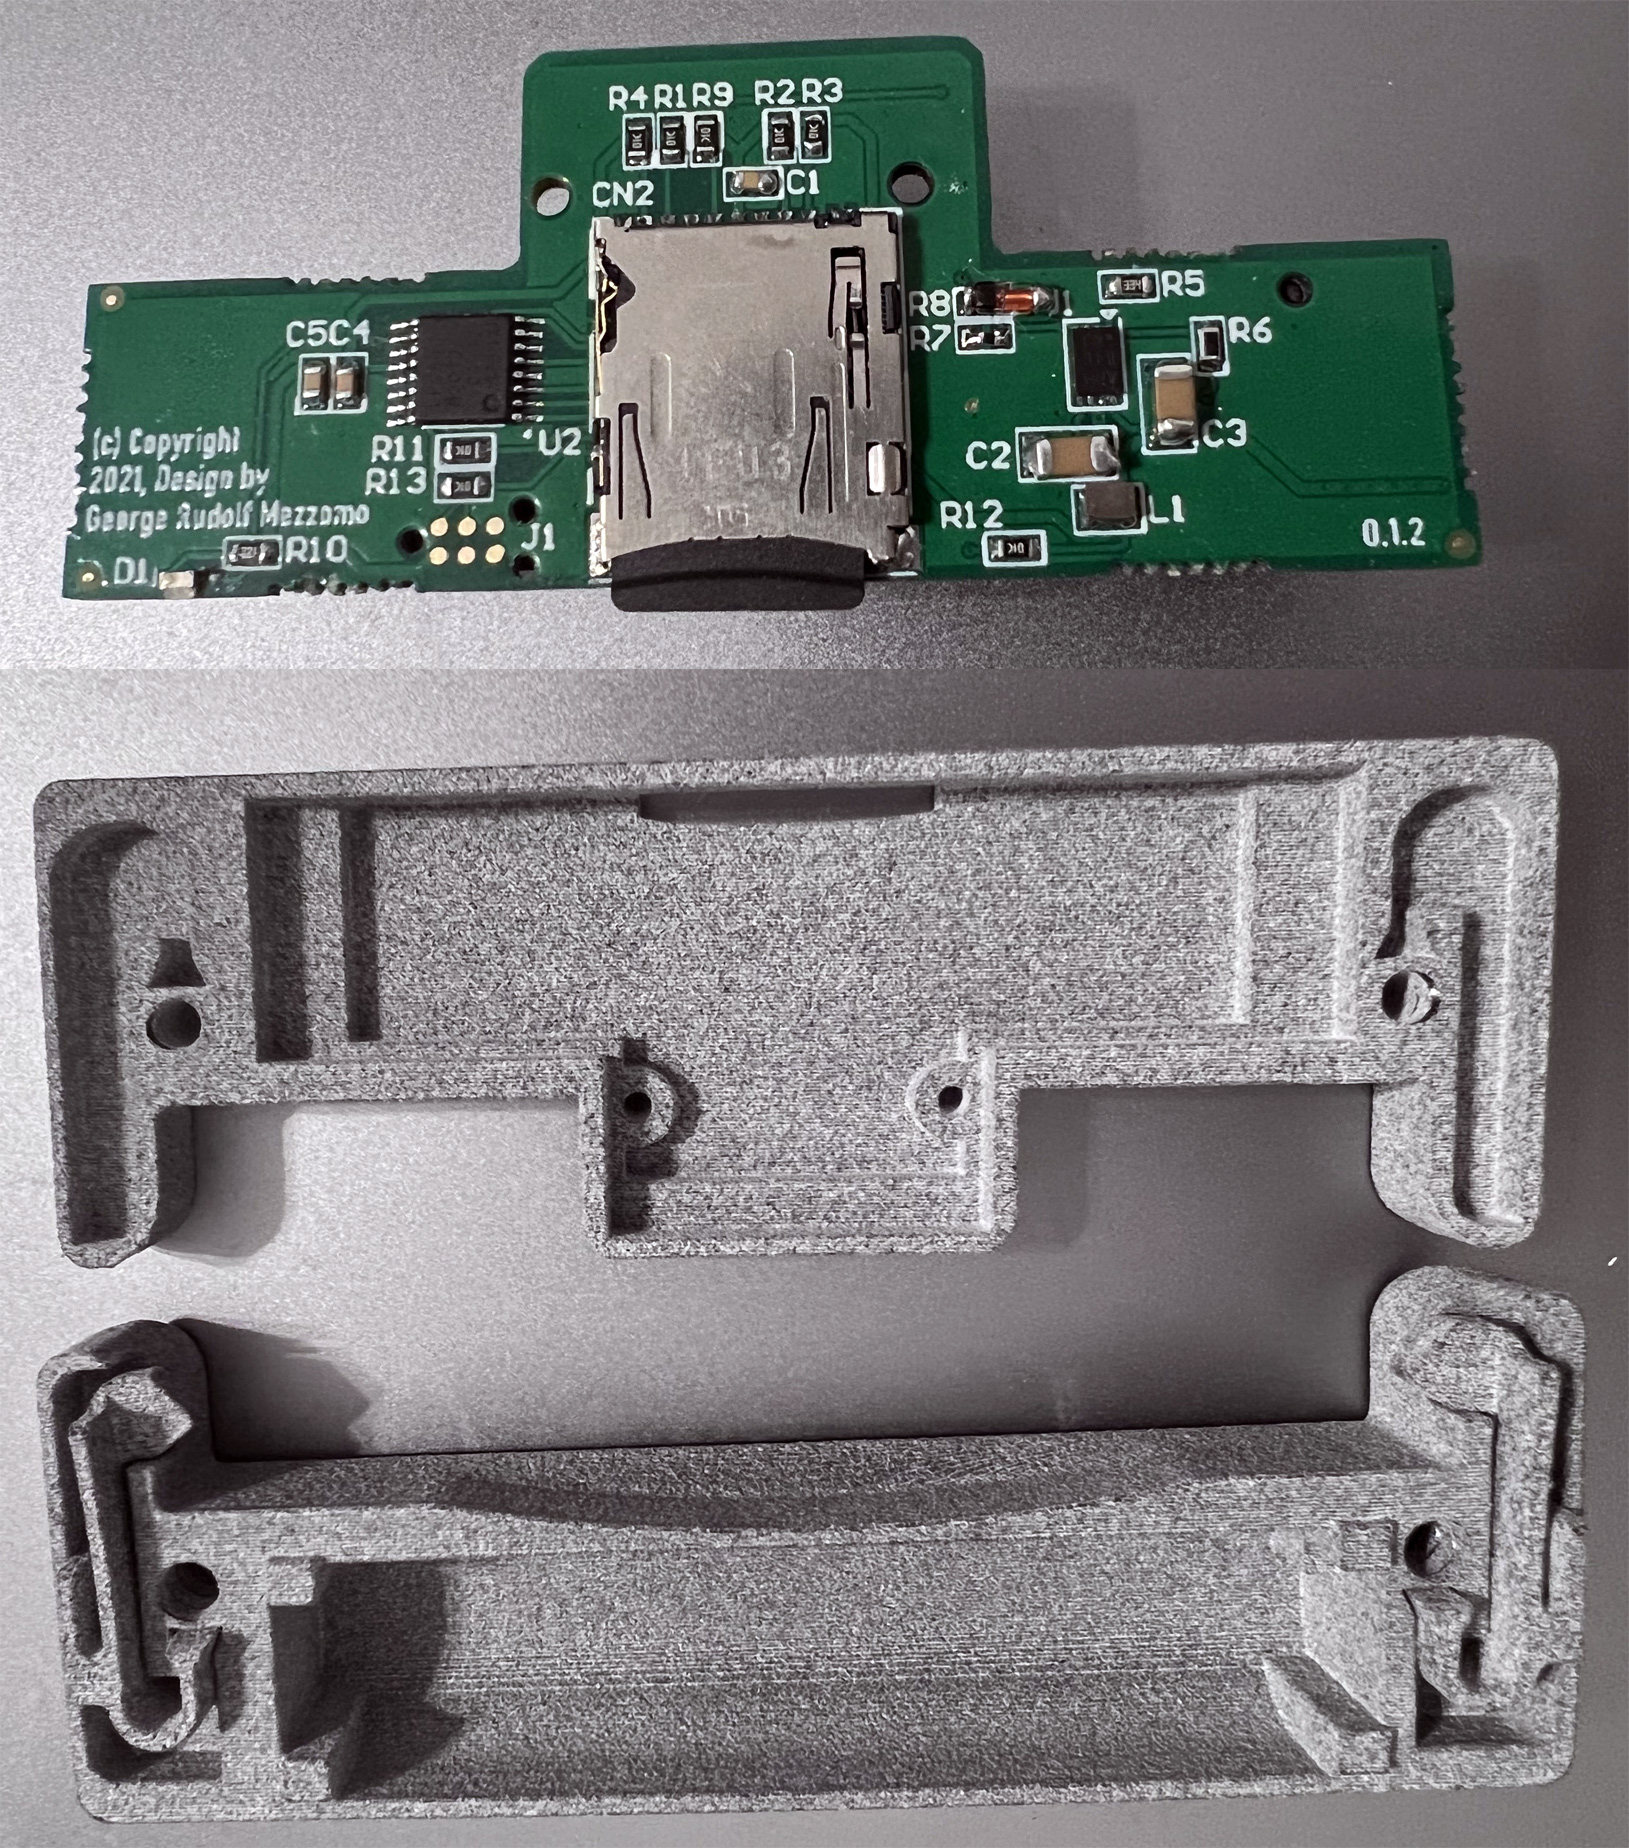
Actual boards

The actual PCBs were designed by George Mezzomo, made by JLPCB, and assembled by MP. Thanks to a lot of prototyping up front, the first board worked pretty well from the very start!
Plastics
To hold on to the device and to mate with the connector properly, plastics were needed. These were designed by Samuel Pinches, and after a few revisions are now perfect. He went all out, even including little spring clips that grasp the device with a perfect amount of force! The final design can be printed at Shapeways for under $20 and looks and feels great!
Firmware
...It should be as standalone as possible, as easy to use as possible, and as easy to set up as possible...
The simple things
Talking to an SD card from a microcontroller is not hard. I've done it enough times that I had code I could copy and paste (and I did). The communication over a serial port was also not that difficult. I had a prototype working in a day, talking to a PalmOS 4.0 device (more on why later). However, the driver had to somehow get onto the device. I was initially just using an existing expansion card to load it, but obviously that will not work if SASD is the only expansion card the device has. What to do?
HotSync
All PalmOS devices can synchronize data with one or more computers over USB or serial. All of these old ones I was targeting were serial-only. The protocol was not documented (though parts of some structures were in the SDK), but how hard could it be? Turns out that is was not that hard. After a few days of disassembling Palm-side code and watching the serial traffic I had a working implementations of the PC-side code. Using this, I was able to install files to a PalmOS device by pretending to be a PC. The packets differ from the ones I use for requesting SD operations, so receiving a packet allows us to quickly determine if it is a HotSync request or an SD request and act accordingly.
This did require a bit more work, though. I now needed a simple and small FAT12/16/32 filesystem driver in the microcontroller, and a parser for the Palm PRC file format too. With some effort all of this did fit into my 16K of flash. This provides a great driver install experience: connect device to Palm, click "HotSync" on Palm, the driver is installed. This got extended a bit further later to install other files as well. Currently, all files from /PALM/PROGRAMS/SASD are installed on HotSync. Does it work? Yes it does!
Firmware Update
As the firmware already bumps into flash size limits of the LPC802, there was no space to implement a fancy firmware update mechanism. Instead, I simply erase the flash and reset. Then the ROM bootloader runs and new code can be uploaded. More on this later.
PalmOS-side software
RetroFix
Initially, I tested on a PalmOS 4.0 device. This was useful to limit the number of things I was debugging at once - PalmOS 4.0 has the Expansion Manager working as part of the OS and thus I knew it was never a factor in any crashes or data issues. But the actual goal of the project was to support as far back as PalmOS 1.0.
With every PalmOS release (like any OS) more API are added. Expansion Manager, as we know it, got added to PalmOS 4.0. Sony had an earlier version working in PalmOS 3.5.3. As expected, this means that the Expansion Manager manager uses a lot of the API available in those OS versions. This presents quite a challenge for attempting to run it on earlier OS versions. RetroFix provides the missing bits. The first part is the "TrapExpander". PalmOS APIs are called using a "TRAP #F" instruction, followed by an API number, which begins at 0xA000. New APIs are always added at the end, and very rarely (mostly in the 1.0 -> 2.0 transition) are current API changed. The dispatch is done using a function pointer table in RAM, pointed to by a global stored in a known memory address in what are called PalmOS low-memory globals. A nearby value also gives the "number of traps available". Clearly newer OS releases must have a bigger table, to fit more function pointers.
We start with Trap Expander. So what does TrapExpander do? It allocates a new memory chunk to store a bigger table, re-points the global to it, and adjusts the "number of traps" variable. There is an additional technicality. On PalmOS 1.0 there is very limited dynamic heap (where normal allocations come from), so I decided to use the storage heap (where persistent data is usually stored). Since this heap cannot be directly written to, I had to replace the API that are normally used to patch things: SysGetTrapAddress and SysSetTrapAddress. This allows me to properly write to the storage heap when needed, using the proper API: DmWrite. We also fill all new entries with pointers to SysUnimplemented as is expected.
Now that we've expanded the trap table to fit in the function numbers matching as high a number as functions we intend to provide, we can proceed. Each set of patches is modularized, since they target different OS versions. We proceed in order from oldest to newest, adding missing things. This means that PalmOS 1.0 gets more things patched than 2.0, which, in turn, gets more patches than 3.0. Each logical patch is compiled into its own code resource. The system calls each one, in order, on boot. Each decides if it would like to be installed, and if so, installs itself, and locks itself in memory so it is not moved (since now there are global code pointers pointing to it).
Some patches add a single missing API like DmDatabaseProtect(), while others add a common suite of API, like dynamic form and control creation. A third type adds entire subsystems, eg: Text Manager and Exchange Manager. PalmOS 1.0 was pretty spartan, here are a few examples of APIs that were only added in PalmOS 2.0: SysLibLoad, StrNCompare, MemCmp, StrNCaselessCompare. Yup...
The 1.0 -> 2.0 transition also renumbered some APIs. The last 4 in the 1.0 table were reused in 2.0. Sadly, a few of them are ones we need to patch. Luckily nobody but the system itself used them, so my patches check where the call comes from. If it is coming from inside the System.prc module, we execute the old meaning of this function, since at the time System.prc was compiled, that was the meaning. Else, we execute the new meaning since we know that nobody used the old meaning outside of the System itself.
It is important that the Expansion Manager is loaded after all these patches are put into place, but the system makes no promises about the order that it loads extensions in. So we change the database type of the Expansion manager from the normal "extension" type of "extn" to a custom "extx" one that the system will not act on. As a last step of TrapExpander's operation, it'll find all files of this type and load them as extensions. It is thus assured that the Expansion Manager is only loaded once the patches are ready.
This code builds with CodeWarrior, as is canonical for PalmOS, but it also builds with modern GCC, which has better optimization, allowing some 2KB of code size savings. This matters on old devices, where as little as 512KB of RAM is available. More info is available in the README in the RetroFix directory.
More Expansion Manager Hackery
Some things were too difficult to add, so I instead patched the Expansion Manager to not need them (eg: SysNotifyBroadcastFromInterrupt). Instead we do what Sony did in their PalmOS 3.5 devices with expansion: enqueue a special key into the system key queue, since this is allowable in interrupts. Then when it comes to the head, in SysGetEvent, handle it as expected.
The Slot Driver
The driver that provides the block device primitives to PalmOS is called a slot driver.
Serial Woes
The Slot Driver for SASD is a strange one since it relies on the Serial Port. The Serial Port is itself provided by a library. All libraries in PalmOS get notified of the system going to sleep or waking up, but the order is not guaranteed. This is a problem for us since if we try to re-establish comms on wake-up, the serial port library might not yet be ready at all. Fun! The solution here is to set an alarm zero seconds into the future. Alarms are processed after all SysLibWake() calls are done to the libraries. This does work.
The next excitement comes from the desire to really support PalmOS 1.0. You see, there were three versions of PalmOS serial manager API: The 1.0 (only in PalmOS 1.0), the 2.0 (in PalmOS 2.0 and later), and the "New Serial Manager" (per-device, and everywhere since PalmOS 3.3-ish). Using the third API made no sense, since the second was good enough. The issue was that the 1.0 API was a rather quickly-put-together mess, and it showed. For example, the SerReceive() function does not return the number of bytes it actually received. There is no way to know how many bytes you did get. Palm engineers must have realized this, and fixed it in 2.0. But, I wanted to support 1.0. I spent some time disassembling the driver and confirmed to myself that if one first queries the number of bytes available, using SerReceiveCheck(), there is no code path that returns fewer bytes, if that exact number is requested. Good enough. I only verified this in the PalmOS 1.0 ROM, however, so if PalmOS 2.0+ is detected, I use 2.0 API instead.
Speed Woes
Obviously, we want storage to be as fast as possible. There are issues, however. First of all, the 68k processor is very very slow (IPC < 0.25, Fclk = 16MHz). Next up: the fastest possible serial port clock on the 68k is the CPU clock divided by 16, divided by integers 2 and greater, which means around 500KHz maximum. But even if we get data in that fast, we couldn't possibly process or even store it that fast. Next fun bit: the UART in the 68k has a tiny barely-there-at-all FIFO. Luckily flow control makes sure we at least do not lose data. But worry not, it gets worse! The serial interface chips (one of SP385, MAX3232, LTC1385) are only specced to work up to 115,200 bps. In reality they can do a bit more. How much? Well, it depends! SP385 happily handles up to 207Kbps, MAX3232 handles up to 635Kbps, and LTC1385 seems to handle 330Kbps well. Luckily we can detect which chip the particular Palm device has and adjust accordingly. Just kidding, we cannot! I wrote SASD to default to 115,200 and designed a control panel application that you can use to adjust the maximum speed attempted until it errors out, then back down.
If you remember, attainable speeds are integer divisions of CPU speed divided by 16. But CPU speeds differ. Some Palm devices have 16.58MHz CPUs, some have 20.25MHz CPUs, and some have 33.16MHz CPUs. Clearly, the available speeds thus differ between them. PalmOS Serial Manager API does not have a concept of attainable speeds. It will simply pick the best possible divider for any baudrate you request. For low speeds (below 115,200) this works out wonderfully and error is always below 5%. As we get into hundreds-of-Kbps range, however, the errors accumulate if you request a baudrate that is not a proper integer divisor. For example, on a 20MHz device PalmOS will happily let you open the serial port at 500Kbps, but the actual rate will be 421.9Kbps. If you try for 550Kbps, you'll get 632.8Kbps instead. The OS has no way to report back to you what speed you got. I strongly suspect that this is the first time anyone's pushed these devices to these speeds, so the lack of this functionality is not surprising. What do we do?
Luckily, PalmOS stores the current CPU speed in a low-memory global at 0x12E. Given that, we can calculate the possible speeds that are actually attainable with perfect correctness. We then apply the speed limit set by the user, and then negotiate with the SASD device. As mentioned above, LPC802 was chosen for its fancy baudrate divider (a.k.a. FRG - the Fractional Rate Generator). It can hit any baudrate with +/-3.6KHz-or-better accuracy, which works out wonderfully for us!
When we establish comms, we do it at 9.6Kbps. SASD and the PalmOS driver then negotiate by exchanging their respective maximum speeds. A speed is then chosen and a speed change occurs. More on this in the next section.
Comms protocol
On The Wire
Due to the way UARTs work, any character can get dropped (framing error), corrupted (noise during a character), or spontaenously created (noise during line idle). This is true of both directions. How does one build a reliable packet transport on top of this? Palm's Hotsync solved this problem, obviously, and I had planned to use their code for this. In some PalmOS versions the functions with named beginning with "Slk" are exported publicly. Sadly this is not the case in PalmOS 1.0. I reimplemented this code for the firmware and for PalmOS side as well.
Of course, a checksum is needed. CRC16 is used. But this does not help in case that a character is dropped. You'll be waiting for what you think is the last checksum byte forever. No fun. Worse yet, if the "length" value in the packet header is corrupted, you might think you're receiving a very large packet and miss out on many real packets till you realize. This is actually a fun interview problem! So what do we do. First of all, add a magic value to the packet header start. This will allow skipping random garbage on the line as well as the tail end of a packet we failed to receive and to zero in on a valid potential packet header. Then we should also have a separate header checksum. This will validate that the header we thought was valid, really is. There is still a chance that this is wrong. A fun pathological case is: a packet whose payload contains a valid packet header and whose real header is noise-corrupted. The solution to this is a sequence number in each packet and rejecting any packets that are not the next sequence after the last-ACKed packet. Well, you can see the details in the source, but it does work. On top of this we can also build a layer that will reassemble larger packets, and we do. Cool!
Higher Layer
Now that reliable in-order transport of arbitrary-sized packets is available, the next layer handles the business logic. Each higher level packet has a packet type and an arbitrary number of payload bytes whose meaning depends on the type. Only 14 packet types are defined. CMD_PING = 0x00 can be sent from PalmOS to SASD anytime to verify connectivity and link reliability. It includes 31 bytes of random garbage which will be echoed in the reply, whose type will be CMD_PONG = 0x40. This inclusion of some random bytes will make sure that if our link is unreliable, this exchange will fail or timeout. CMD_GET_INFO = 0x01 can be sent from PalmOS to SASD to get some information about SASD and the card inserted. The reply will be a packet of type RSP_INFO = 0x43 which will contain the SASD hardware and firmware versions, SD card size, serial number, manufacturer and flags. CMD_FW_UPDATE_START = 0x06 is used to tell SASD to initiate its firmware update mechanism. Realistically this simply replies with an RSP_OK = 0x41 packet and then erases its own flash and resets (into the ROM bootloader). The command CMD_SET_BAUD = 0x05 is used to initiate a speed change procedure. Palm will include its max acceptable speed in the packet. SASD will lower it to its maximum speed, reply with an RSP_OK packet with that new number, and use that speed in the future. CMD_GET_BATT = 0x07 is used to get battery info from SASD. Reply comes in an RSP_OK packet with both a voltage and a percent full rating of the battery. At any point in time, an RSP_ERROR = 0x42 packet may also be sent from SASD, for obvious reasons.
The CMD_RESET_STATE = 0x04 packet is used to reset the data transfer state machine from any weird error state, but is not used in normal situations. To read from the card, CMD_READ = 0x02 is sent. If it is accepted, an RSP_OK packet is sent and SASD enters read mode for a given number of packets. It will now wait for NOTICE_CTS = 0x80 packet from PalmOS, in reply to which it'll send one sector of data. This repeats till all sectors are transferred. Writes are handled similarly. CMD_WRITE = 0x03, if accepted, enters the write mode. Then PalmOS will send one sector at a time in a NOTICE_XFER = 0x81 packet.
Using SASD
PalmOS 1.0 Expansion Manager Use Cases
The number of PalmOS applications that will run on PalmOS 1.0 AND support Expansion Manager API is rather low. It is zero! While Expansion Manager was never really tied to any particular PalmOS version, and the proper way to use it is to check for it specifically, it came about around PalmOS 4.0 time and much software at that point already did not support PalmOS 1.0. But I was not going to be dissuaded this easily! One of the main uses of expansion cards is backing up and restoring devices. Another is installing software and copying files in/out of Palm's memory. Challenge accepted!
Bkp1
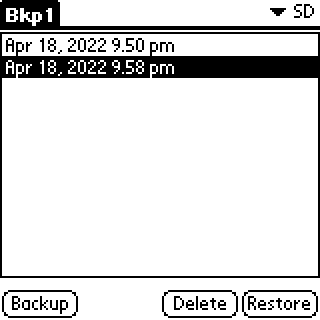
I tackled the backup case first. I present: Bkp1 - the first ever backup manager that is compatible with PalmOS 1.0. It is rather simple, but then again, source code is out there, go improve it! It can make a backup, restore a backup, delete a backup, and rename a backup. Each backup is simply a directory under /PALM/PROGRAMS/BKP1 containing the PRC and PDB files. The name is auto-generated based on the current date and time.
Mgr1
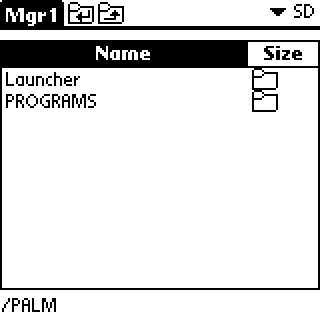
A file manager is a bit more complex, but here it is: Mgr1. It can traverse directories, edit file attributes and names, and import and export files to RAM. It can even move and copy entire directories recursively. Files can be sorted by name and size, in either order, ROM files can be hidden or shown. Of course, more features can be invented, and feel free to! Source included!
Filesystem
What good is an SD card driver if there is no filesystem driver? Palm's own FAT driver had issues. It was large, it required a lot of RAM, it was rather slow, and it required a lot of PalmOS 4.0 APIs. It also did not support FAT32, so cards over 2GB were unusable. Yes yes, I know, we are talking about a 1996 pocket device with 512KB of RAM. But that makes it even cooler to attach a 512GB of storage to it! I was going to write a fully featured FAT12/16/32 driver, but then I decided that I had better things to do. I ported CHaN's FAT driver to PalmOS, bolted a write-through sector cache unto it, and did some optimizations and fixes. The result is what I call SlimFat. It is smaller than Palm's driver, faster, and supports FAT32. It is also perfectly safe to install on other PalmOS 4.0 devices to add FAT32 support to them! Source is also included. Just like RetroFix, SlimFat will build with CodeWarrior or with GCC. The GCC version is faster and smaller. There is a build-time option (CACHE_NUM_SECTORS) to disable or set the size of the cache, this saves runtime RAM (used for cache) at the cost of speed.
Software (pt3)
SASD prefs
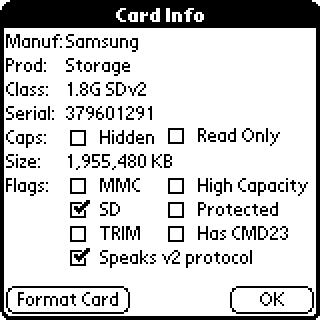
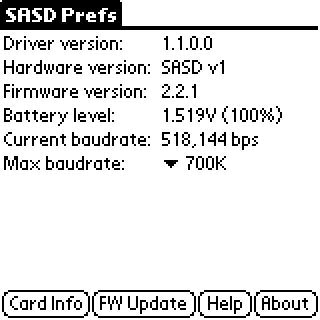
The preferences app provides the ability for the user to control the SASD device. Here the firmware update mode can be entered, SD card can be formatted, and detailed card info can be seen. Firmware, hardware, and driver versions can also be seen here. The interface speed limit can also be set here and the current interface speed is shown.
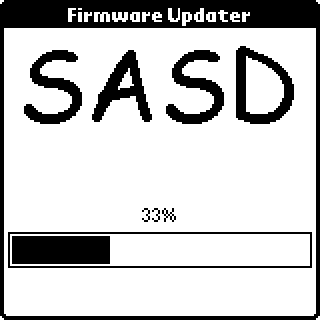
SASD Firmware Updater
LPC802 was chosen, partially, for its ROM bootloader which I expected to use to load firmware into it for initial flashing and update purposes. This was not as clever as I had thought. The ROM bootloader expects the UART to be not-inverted (a reasonable assumption). Well, ours is inverted, as explained above, so it turned out that I simply could not flash the firmware as designed. Well, I can make up for my initial oversight with sheer willpower!
There are, however good news. First - the firmware is small. That is nice. Second - the chip will auto-sense the baud rate when bootloading, instead of defaulting to a common one like 57,600 or 115,200. So what could I do? Well, I disabled interrupts, and I bit-banged inverted UART using the pins as GPIOs. It is not fast. Effective rate is about 4,300bps. But that is enough for our purposes.
First we open the serial port using the proper PalmOS API. This ensures that the serial port interface chip is powered up and other hardware things that need to be configured - are. The bootloader protocol is request - response. So the basic unit of the provided API is: "send these bytes, and wait for this many bytes in reply, with timeout of this many milliseconds". The code for this is in bbUart.c, enjoy.
The one annoying thing is that the LPC chip does not turn on its UART's TX till it hears a character '?' from us. This means that the line idles low, causing us to think it is a start bit if we begin listening too early. To save us the trouble, We just do not wait for a reply to the question mark message, and just proceed with the next ones, which get a proper reply we can check for and time out on, if needed. In the end, it takes about a minute to flash the firmware and it works well. On faster devices the baudrate is higher, on slower devices it is lower, but they all work.
Here also you can see the project logo - "SASD" in Comic Sans. I simply could not imagine a more apt logo for a project of so little utility and practicality!
How to make your own
First you'll want to order the parts. You can use mouser, DigiKey or you favourite other parts source. The main important non-replaceable bits are: LPC802M001, BZT55C5V1-GS08, MCP1640T, 6 of TE 2306654-3, Keystone Electronics 1076 AAA battery holder, and DM3AT-SF-PEJM5. Besides that, you can get (from any source) the rest of the passive components - see the schematic for the list.
Next, you'll want to get the board made. The included gerbers should be good enough for any board house. I use JLPCB, but any should do. It is a simple 2-layer board without anything too complex on it. This is also a good time to get the plastics made. I used Shapeways to print them out of their cheapest material - plastic #12. It works well. You can also get them printed elsewhere or print them yourself.
Assembling the boards should not be very hard - components are spaced far away from each other. You can also pay to have the board assembled by your board house in some cases. Your call.
You'll need to prepare your card. Format it using FAT12/16/32. Some 32GB and larger cards nowadays come formatted with exFAT. You'll need to reformat those. Then, place the contents of the "install" directly from the downloadable archive here unto the card. The card is ready.
The final step is to flash the firmware for the first time. You'll need to get the firmware updater unto a Palm somehow. Beam it or HotSync it - it does not matter. Then insert a battery into SASD, run the firmware updater on the Palm, connect SASD, and tell the updater to proceed. If all goes well, the updater will now flash the firmware to your SASD device and you're ready to use it. Run HotSync on the Palm to have SASD self-install its drivers. Enjoy
Downloads
Here is what you came here for, the downloads. You can get everything HERE. What is included? The "hardware/altium" directory contains Altium documents that make up the schematics and layouts. In "hardware/gerbers" you may find the gerbers that you can send to your favourite board house to get a board made. Also, in "hardware" you may find the schematic in a png format for easy viewing. In the "plastics" directory you may find the STL files you'll need to get the case printed. Also included is a printing guide to help you not mess up too much.
The "software" directory includes: sources for Mgr1, Bkp1, SlimFat, RetroFix, the SASD firmware updater, the SASD prefs application, and the binary-patched expansion manager needed to make SASD work. Of particular interest is the "serialSD" directory here, which contains the SASD slot driver and a "firmware" directory that contains the firmware for the LPC802.
The "install" directory contains the stuff you need to place onto your microSD card if you want SASD to be able to auto-install itself via HotSync. If you do not want Mgr1 or Bkp1 auto-installed you can remove those binaries from this folder.
Comments...
